With MOBIX Park & Charge, parking space, and charging station owners can earn extra income by offering unused parking spaces and wall boxes in the MOBIX app and making them bookable for other MOBIX users. This simple way of earning extra money also eases traffic, as drivers no longer have to search for parking spaces and charging stations but can find, reserve, and pay for them in the MOBIX app.
In this first version of MOBIX Park & Charge, you must meet your customer to start and end a parking or charging session. In future versions, we will simplify the process and enable parking and charging sessions without personal contact. This step-by-step guide will show you how easy it is to add, provide, and earn money with your private charging point with the MOBIX Park & Charge feature inside the MOBIX App. All screenshots have been taken from a test version of the MOBIX app – images and numbers may differ from the ones in the upcoming live version.
How to add, provide, and earn money with your private charging point
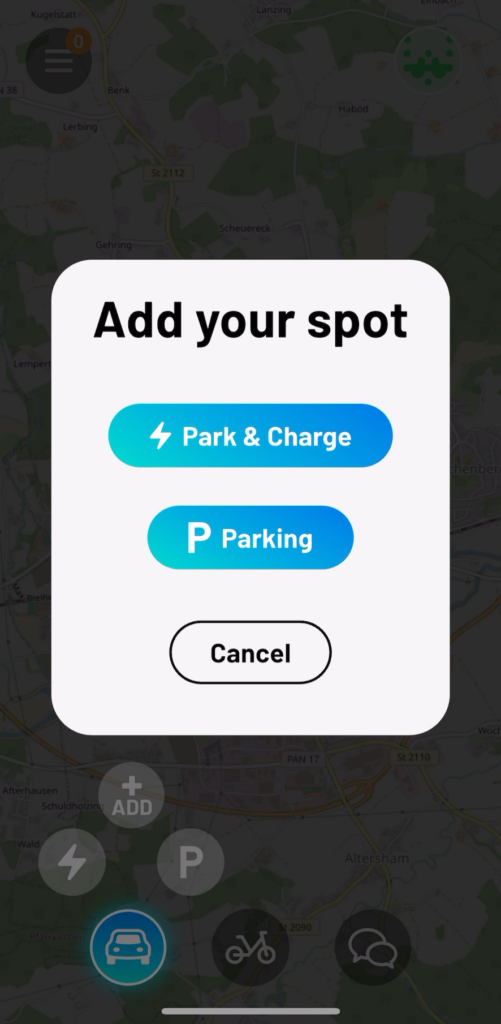
- Open the MOBIX app. The car icon in the bottom left corner allows you to add either a park-and-charge or a parking spot.
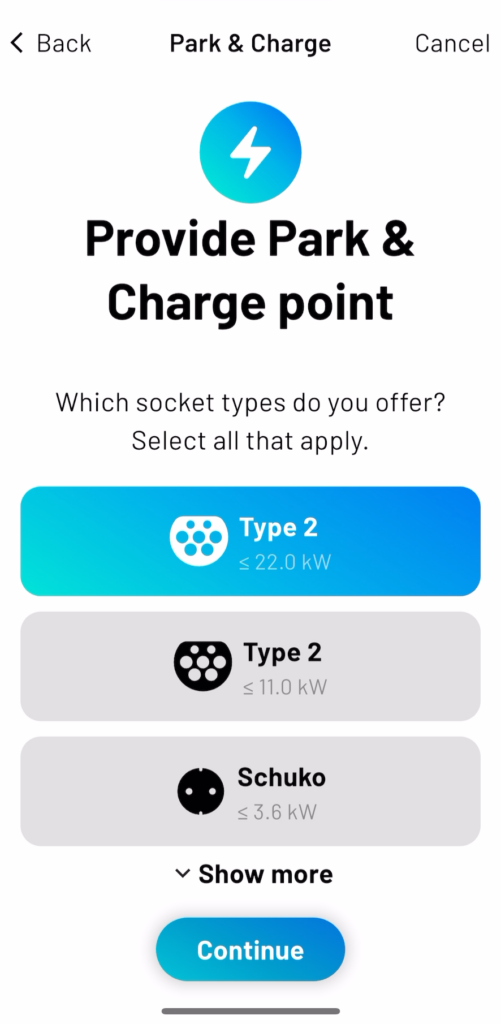
2. As a first step, select the plug your charging station offers. The MOBIX app supports most of the commonly used plugs today.

3. Afterward, you can either specify a single continuous timeframe or create a schedule with different timeframes for each weekday.
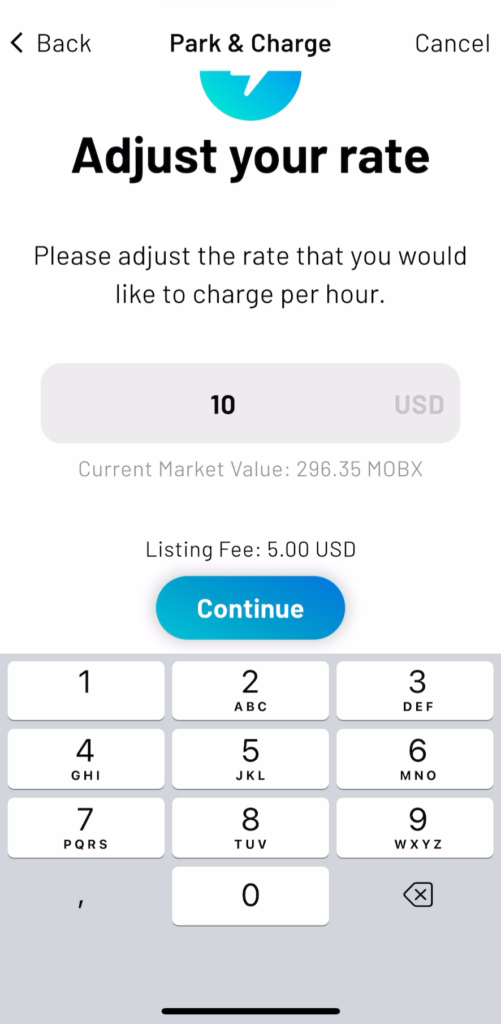
4. Next, you need to specify the rate per hour in USD that a MOBIX consumer must pay to charge at your charging point. MOBIX charges a one-off listing fee of 5.00 USD for every onboarded charging point.

6. After you have set your price, the next step is to enter the address of the charging point so customers can find it and know where to go. Via a pin, you can fine-tune the exact location of the charging point.
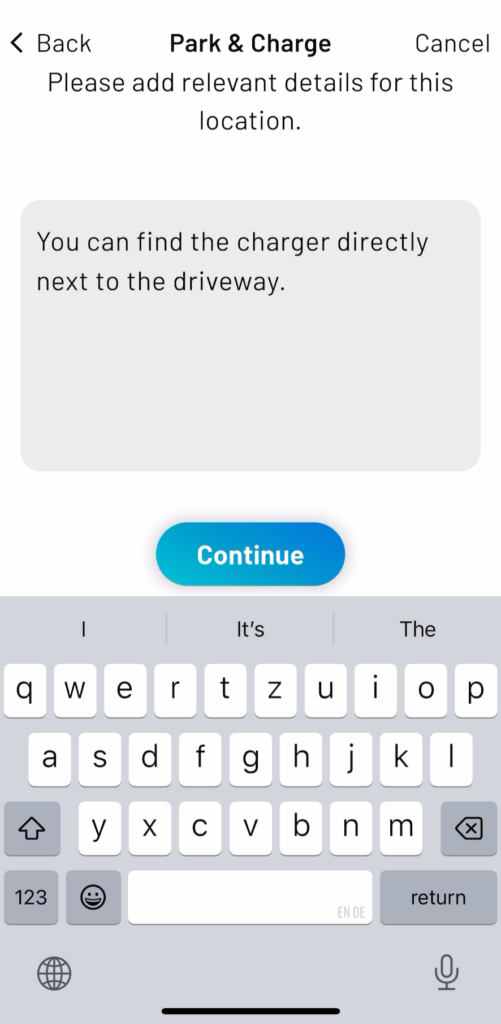
7. You can also provide additional information about your charging point through a minor text annotation.
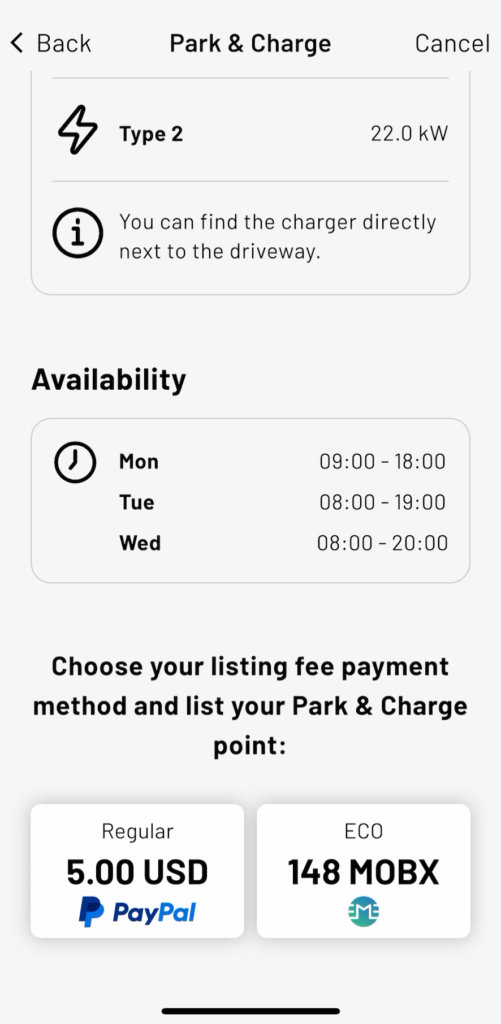
8. In the last step, you should confirm that everything was specified correctly and then select either PayPal or MOBX to pay the aforementioned listing fee.
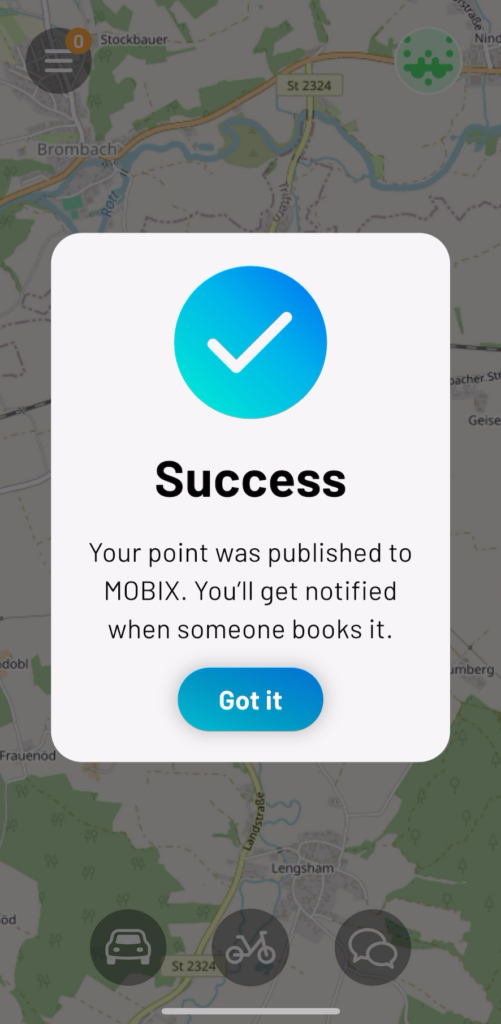
9. That’s it! Your charging point is now onboarded and can be found on the map by potential consumers. When someone books your charging point, the MOBIX app will notify you.

10. Your activity screen shows your onboarded chargers and any reserved, ongoing, or completed park and charge sessions.
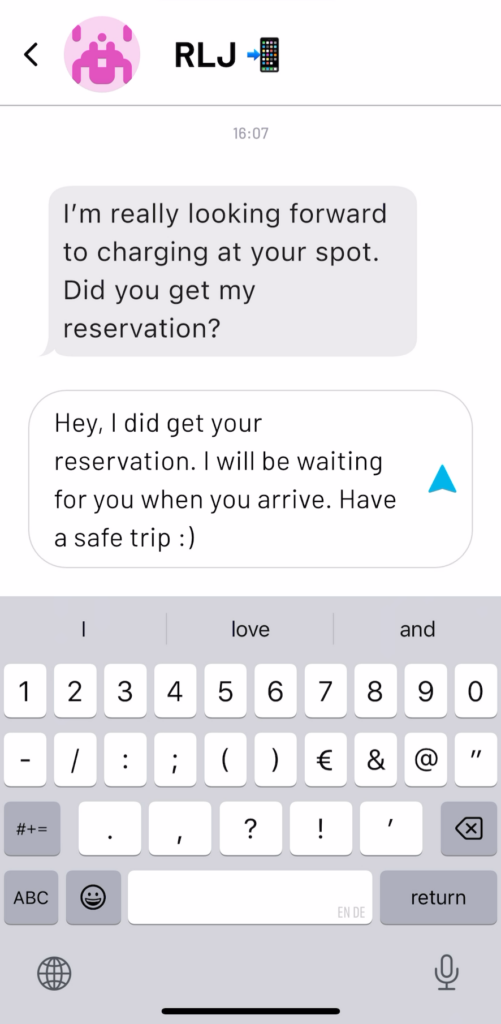
11. The MOBIX app also provides private chat functionality to connect with your customers. The chat is based on the technology of our partner, Fetch.ai. Only people in a transactional relationship can chat with each other, so you can be sure that you are chatting with the right person! This also allows you to share sensitive information, such as access codes to garages or gates, with the person you are chatting to.
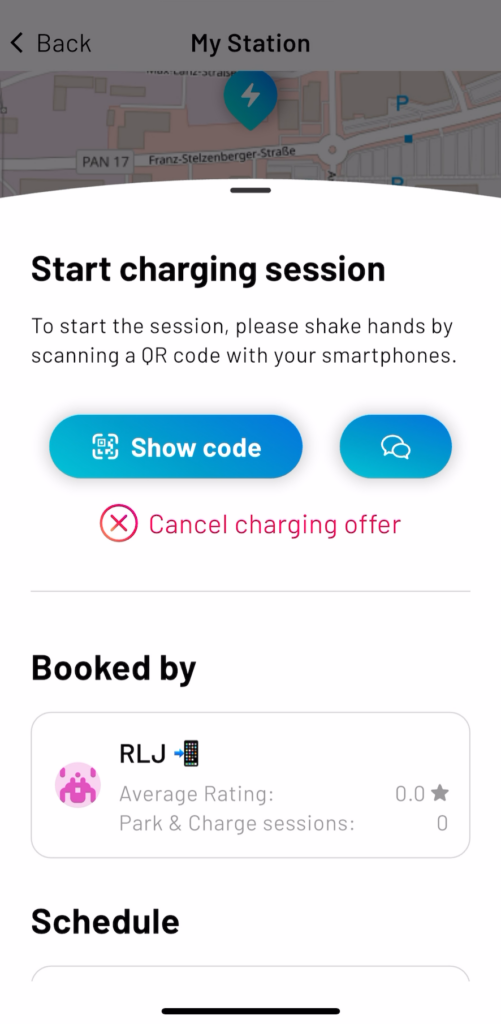
12. To start a session, you show your QR code to the customer for authentication. The charging session begins after he successfully scans the code on his device.
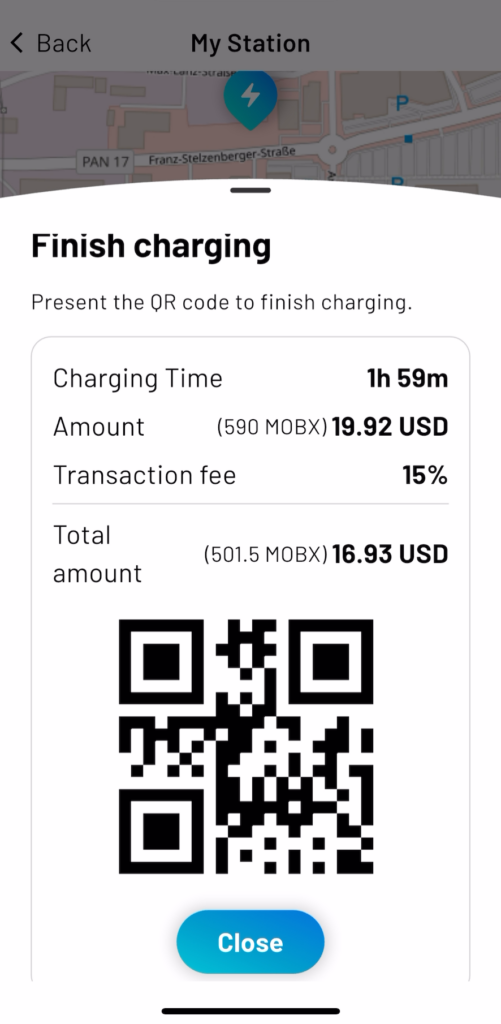
13. To end a session, you or your customer can press the end charging button in the app. Afterward, you will receive a summary of the charging session, including the total amount that needs to be paid. Once again, you must show your QR code to the customer so he can scan it and complete the payment.
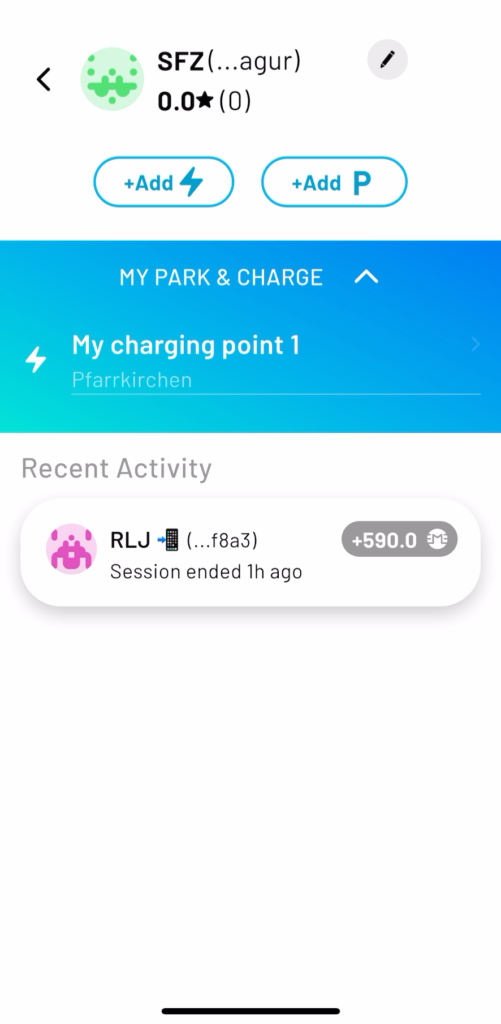
Success! You added your charger and completed a park-and-charge session. From now on, MOBIX users can find and reserve your charging station in the app. We have described how to do this here. Of course, you can indicate on-site, i.e., on your house, garden gate, or similar, that people can now park and charge at your location. Use one of the corresponding templates on our website! The MOBIX team wishes you every success in renting out this parking space or your charging station!
Thank you for being a valuable member of the MOBIX family!


You must be logged in to post a comment.